An old melody

20171113_130232

I’m at my mum’s place these days, as mum wants to buy my outfits for my brother’s wedding that’s coming up next month. But I have decided to stay back for more as we need to take care of the Sangeet (one of the most important wedding functions for us). From selecting the songs to convincing the family members that things would be all right at the Sangeet, there is a lot that needs to be looked into.

Today, however, the best part came when I got to know that the ladies of the family (who are in the same city) need to make badis to mark the start of the wedding festivities in the house. When my mum announced this to me in the morning, I was delighted as making badis in the morning or noon sunlight on the terrace is something I could recollect from my childhood. I absolutely loved it as a kid when mum used an old cotton saree to make badis. Never did I care about its recipe, but it was just her and one of my aunts drying the badis in the sun and the whole thing never ever looked tedious to me.

20171113_124103

Mum soaked 1.25 (an auspicious number for such important events) kg of yellow moong dal for a few hours, and made its paste with a dash of turmeric powder. We took the paste in a white tub, a big spoon, a small copper jug (with water and mango leaves), and a copper plate (with kumkum powder and rice) for a little pooja (prayer) that was supposed to be done before making the badis. Now, not always do we perform the little pooja, but because this activity was only a signal of the start of the wedding preparations, the pooja had to be done. Each lady got a tikka on her forehead (with soaked kumkum powder and rice grains). There were a few plastic covers that we spread at one of the corners of the terrace that had some shadow. Then, there were those plastic airtight bags, a pair of scissor, a small piece of jaggery and a bottle of oil that neighbour aunty suggested to spread on the red plastic sheet before making badis.

Soon, the ladies started singing songs for lord Ganesha and drawing the badis. Some ladies drew broken lines and some of them created dots with the dal paste that was filled in the zip-lock plastic bags. The scissor was used to create a small hole before adding the paste though. These badis were supposed to be kept in the sun for the entire day. In the end of little activity, one of my aunts gave little jaggery blocks (decorated with gota lace) as a token to thank them.

20171113_232445

Later in the evening, mum, dad and I went to the terrace and brought all the badis home. The badis had sticked well on the plastic, so we had to use a knife to remove them quickly.

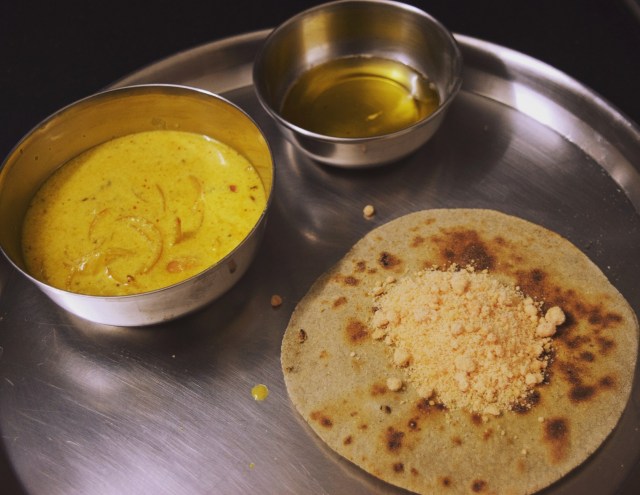
In Jaiselmer, we use badis in sabzis like Papad ki sabzi, Gawar fali badi kachari ki sabzi, etc. All ladies of my family have a bottle of badi in their kitchens. And somehow, it’s always considered auspicious. I’m assuming one of the reasons could be the many health benefits of moong dal.

Whatever the case might be, I’m always curious to know what happened in the kitchen when my mum and beloved aunts were growing up as kids. How tough their life must be and but, yet so beautiful. “Oh, we had no money. We never had the luxury of unlimited and family food. But we were still happy. Not like these days where people are always dissatisfied with whatever they get to eat,” says my aunt, whom we call Bhua (my dad’s sister). These days, there are endless kitchen products available in the stores that we fascinate for. I wonder who fascinates homemade things like badis.

Daily inspiration

IMG_20170904_203540_587 - CopyMonotony. We certainly need to strive hard to break it, constantly. There are so many things that can stress you out. Sometimes, you can’t stop thinking about how things could be better. But, then, you have to let go of your worries, and start breathing; once again.

As a homemaker, and, now, as a freelance writer, I have to find joy in every household chore. Cooking, however, is something that takes a lot of my mental work. ‘What should I cook today?’ is the question that kills my mind every morning. I do enjoy cooking; and when I don’t, I feel that something is missing; but, cooking, as a daily chore can be extremely monotonous. And, many a time, I fail to live up to it.

And, come on, I can’t be making pasta, hot and sour soup, Japanese-style salad or a chia seed drink daily to feel better. I have to face the veggies! Before preparing every meal, I see the veggies in the fridge and find none of which I feel like eating. Creativity and veggies hardly go hand in hand during the week, for me, at least.

Nonetheless, when you play with textures and flavours, you can, I believe, break the monotony. We never got new items to eat every week in my mum’s kitchen. But, still, almost all the dishes that she made, had us kids drool them. Like this Mirchi ki sabzi.

It looks hot, but it isn’t. It is tangy in taste and soft in texture (can be mashed easily) and goes perfectly with my roti or rice. What I really like about it is that it doesn’t go stale easily. So, I always end up enjoying it the following day also. I can imagine, in a climate like that of Jaiselmer’s, this dish fits aptly.

Till date, I haven’t been able to crack my mum’s exact recipe, but, that said, I’m not afraid of trying it again an again. So, the next time you see these green chillies in your vegetable market, add some in your cart/basket as well. I hope you try this recipe, and feel a little better about the ‘daily cooking’ process. Remember, we have to constantly break the monotony, or else. Well, or else, you might end up picking up the phone and making the food orders ever so often. What do you think?

Recipe: Mirchi ki sabzi (green chilly sabzi)

Ingredients

7 to 10 green chillies (these are thick and long green chillies that are milder than the small ones; don’t mix them with fat green chillies that we use for mirchi pakodas)
1 tbsp sesame seed powder
1 tbsp coriander powder
½ tsp mango powder (optional; I didn’t use it in my recipe)
2 tsp peanut oil or any oil
salt to taste
2 tbsp cream or homemade malai, you could use milk if you don’t have fresh cream (use this only when you think that your chilly is too spicy)
½ tsp cumin seeds (optional)
2 pinches of asafoetida
¾ tsp turmeric power

Method

1. When you buy your green chillies, wash them and make sure all the water has dried up before you make this sabzi. Now, chop them and throw them inside a strainer. Make sure there is a plate below. You basically have to remove the white seeds inside the green chillies; so, you can keep moving these chillies lightly in the strainer, so that the seeds separate.
2. Now, heat oil in a small skillet. Add the asafoetida, cumin seeds, turmeric powder; stir for 2 seconds and add the chopped green chillies. Make sure the heat of the stove is not on high. If I don’t pay attention, I end up coughing.
3. Stir it for a few times till you see the chillies more than half cooked. Now, add the spices and salt. The coriander and sesame seed powders are the winners of the dish.
4. Once you stir in the spices and let them cook for about 3 minutes, add a tsp of malai or cream. This will soften the texture and reduce the heat of the chillies as well. But, remember, if you add malai or milk, your sabzi won’t last long.
5. After about 3 more minutes of stirring, switch off the flame. I usually have this with hot whole wheat or sorghum rotis.

Beat the blues

IMG_20170622_003600_210

Recently, I got a chance to visit London, which I happens to be the most beautiful city I have ever been to. I was there for more than two weeks, and eating outside food for this long was not in my plan. So, one day, being tired of all fancy food, I craved for a simple raita. But, I only had the store-bought yogurt with me, which is something I loathe. Can I possibly be making a yum Raita out of it? I asked myself and went ahead anyway.

Pyaaz ka Raita is one of the dishes my mother is famous for in our huge community. This recipe goes back to the days when she used to live in a desert in my maternal home. Pyaaz ka Raita was made with fresh curd and chopped onions, and it hardly took any time to cook. Which is why, it used to be made a lot in the house. And it tastes yum. So, it wasn’t like anybody was adjusting with it.

For me and my brothers, this Raita is what our home is all about. After returning from a family trip or at the end of a long day when all feel tired, it is this recipe that comes to our rescue. Even in those busy Sunday mornings when a guest kept us busy, my mum manages to cook this Raita and impresses one and all.

So, the next time you’re clueless in the kitchen, tired of the colourful veggies, need something simple and tasty, you know what to cook. You will thank my mother for this one, I promise!

IMG_20170622_003656_082

Recipe: Pyaaz ka Raita

All right, so I generally make this Raita in an earthen pot that I got from Dastkar exhibition (Delhi). When I cook this way, it comes out to be nice with a great texture. You can cook this in a mixed metal skillet as well. We don’t use non-stick pans, and I hardly connect with them so you could avoid them too. Do I make sense?

So, first, we will cook the onions on high flame with the spices. In fact, my mum just adds the onion with the spices and tosses it a bit. You don’t need to cook the onions till it’s completely soft. You just need to mix the spices and let it be crunchy.

The second step is to add the slightly beaten curd. This is a quick process. You see, it took me quite some time to crack this dish. It is simple, but there’s this one rule.

Cook the onions on high flame. Add the beaten curd. Switch off the flame. Transfer the Raita in another pan. Cook the onions on high flame. Add the beaten curd. Switch off the flame. Transfer the Raita in another pan. Cook the onions on high flame. Add the beaten curd. Switch off the flame. Transfer the Raita in another pan.

This way, you will get a Raita that has crunchy onions, and because you transfer it into another vessel, it won’t curdle. So, are you ready?

Ingredients

½ tsp cumin powder
a pinch of asafoetida
¼ tsp turmeric powder
½ tsp red chilli powder
fresh curry leaves (I didn’t have it when I clicked the picture)
salt to taste
oil for tempering the spices
¼ tsp black sesame seeds
1 big onion, chopped
2 green chillies, long-slit or chopped
coriander, chopped
½ tsp coriander powder, optional
1½ cup curd (I use homemade curd that is fresh and lightweight, but you could use those tight/stiff/thick looking store-bought yogurt that comes in a plastic box. Though, I avoid those completely)

Method

1. Add oil in a skillet. Add the curry leaves, asafoetida, turmeric and red powder, cumin, and sesame seeds, and green chilies. Sauté it for 10 seconds and add the chopped onion. Remember, the flame is on high.

2. Add salt, coriander powder and sauté for a minute.

3. Now, add the beaten curd and chopped coriander leaves. Stir it ever so quickly and transfer the whole thing into another bowl (in room temperature). This will give it a nice texture. Voila! The Raita is ready!

My mum serves it with roti, jowar ki roti (sorghum) or bajre ki roti (pearl millet). In the picture, you can make out a thali (prepared in last winter). To keep us warm, we keep having bajre ki roti and lots of jaggery in the colder months. With this type of roti, I like to have lots of clarified butter or ghee as well. During summers, you could have this Pyaaz ka Raita with crispy jowar ki roti (it’s gluten-free, rich with nutrients and my mum keeps sending me a small bag of it every couple of months so that I’m never out of it.)

I hope, this Raita helps you beat the blues that might hit you when you are stuck in a weird situation, a clueless dinner prep time or after an uninspiring day at work.