Basil in my jar

DSC_0269 - Copy (2)

The best part about summer is that one gets to enjoy tasty and enriching natural flavours. I like to see the cool, local fruits, especially, that we get during the season. I have also kept an earthen pot near my water filter machine, to store fresh drinking water. Didn’t get to use this in the last season. Matke ka paani (water stored in an earthen pot) is the best thing that one can drink to quench the thirst after a long summer day spent outside. We don’t have a single plastic bottle in the house. And not a single bottle in the fridge. Somehow, the chilled water of the fridge gets to my throat, and I don’t really like it. You may call me an old school, but I prefer matke ka paani only.

I have been through a few health issues, and a few elderly aunties in my family have recommended a few things to help me out. “This will keep your body cool from the inside,” said one. So, I’m on a constant look-out for kitchen ingredients, like this one, that will help me do just that.

After coming home from work, I and my husband like to catch up on two chilled glasses of milk. But who likes to drink plain milk. So, we add two spoons of Rooh Afza (rose-flavoured syrup) and one more secret ingredient.

Usually, Tukmaria or Sabja (sweet basil seeds) is added in the famous North-Indian drink called Falooda. I want to make sure that I regularly have my dose of this, as it really good for the body. And what better way to make my rose milk drink taste even better?

DSC_0282

I soak a spoon or two of Tukmaria in water. In a cup of water, you can add a teaspoon of the seeds. After about 10 to 15 minutes, the seeds puff up and reach the rim of the bowl. Strain this and add it to your rose milk. I add about two teaspoons of these puffed up seeds in my glass. You can also add these seeds in your water-based drinks. Isn’t it amazing, how such small things can make a big impact on one’s health?

Dear, summer heat, you can go on, because I’m having the best time here. See you around, dear readers.

Coconut diaries

IMG-20160228-WA0009For the longest time, I wondered how can I prepare coastal food in my kitchen. I know, this majorly covers sea food, but I wanted to try vegetarian coastal food. What were the options I had? Coconut is one such ingredient that is hugely consumed in coastal regions. And I started to get a few ideas. I still remember the first time I smelt cold-pressed coconut oil. Its aroma took me back to the sea, for some reason. And, so does grated coconut, that I use in my cookies. And, so does coconut milk for that matter.

My sister-in-law, who lives in San Francisco, recommended Thai cuisine to try, a few years back. Those were our early marriage days, and we never turned down an opportunity to step out of the home. So, we went somewhere at Palladium mall, in Lower Parel, Mumbai, and tried this cuisine. At the restaurant, I found the Thai Green Curry somewhat appealing, and somewhat bland. I knew I could make a better version of it. It was just a matter of convincing myself to do so.

Last year, I got my hands on a can of coconut milk at a gourmet store, here in Gurgaon. And I thought of the options, and, I put it back at the store’s rack. Later,  we went to a nearby Thai restaurant. It was jam-packed and meanwhile in the queue, we saw the menu card kept at the entrance gate. The prices made me think of that can that I left at the gourmet store, and I thought, it would be much better for me to try this green curry at home. We were no more that newlywed couple, and being at home seemed far more appealing to us. And, the restaurant didn’t seem to go empty anyway.

So, there I was. Looking at this can of coconut milk, and thinking, can I do this? I finally took the plunge to cook some Thai Green Curry myself. Quickly, I google-ed the recipe, and purchased the ingredients, and went home.

The process looked a tad bit long when I stood inside my kitchen with the bag of ingredients. “Please help me cook this dish,” I said to my husband. He was hungry, and so helping me make this dish was the best option he had. And then he went on with the list of ingredients. I chopped the veggies and herbs and did exactly what he said. I was way too doubtful and tired, when I reached the middle of the cooking process, if I can say so myself. But, it did give me a break from local flavours. For once, preparing something exotic excited me. Just when I added the coconut milk in my skillet, I knew I’m going to love this recipe. Which I did.

Last weekend, I prepared this Thai Green Curry again. Though I twisted the dish a bit with whatever was available in hand, it turned out to be good. And filling to the hilt. This nutritious curry tastes amazing, all thanks to coconut milk, the star of the dish. Although the whole preparation does need a bit of patience, as the ingredient list is long, I know it’s a matter of practice. All that said, the one thing I’m sure of is that I’m going to use coconut milk more often!

By the way, I have got a new job, and I’m finding it fulfilling too. What about you? What’s that one thing in your life that makes you feel accomplished?

Recipe: Thai Green Curry

Okay, so here’s a confession. I didn’t use all the ingredients mentioned in the usual recipes of this dish. Below is my version of it, where I have used a few local ingredients instead of the exotic ones. There are three basic steps to cook this dish. One, is making a paste in the grinding jar. Second, boiling the veggies and collecting its stock. And third, cooking it all with coconut milk. Lastly, it’s not compulsory for you to get all the ingredients. If you have coconut milk and a few veggies an herbs, you can go for it.

For the green paste
2-3 green chillies
1 tbsp coriander powder (or seeds)
1 tsp ginger, chopped
1 tsp dark soy sauce (optional)
a handful of basil leaves, chopped
a handful of coriander leaves, chopped (this will give a nice green colour)
3-4 lemon leaves
1 onion, roughly sliced (optional)
salt to taste
3-4 tbsp coconut milk or water

Veggies (cut them as you like it)
red capsicum (for the lovely colour)
green capsicum
broccoli (clean it well, cut it and soak in hot water for a minute and strain it)
a handful of French green beans
1 small carrot
1 small potato

Other ingredients
1/2 cup thick coconut milk
2 tbsp coconut oil
a handful of basil leaves
1 cup vegetable stock water
150 gm cottage cheese, cubed (you could use Tofu as well)
a handful of roasted cashew nuts (optional)

Method
1. Grind all the ingredients together, mentioned for the green paste. Keep it aside.
2. Boil all the veggies that you think needs it. You can skip capsicum. Also, don’t forget to save the vegetable stock.
3. Heat oil in a skillet. Once hot, add the capsicum. Roast it a bit.
4. Add the green paste, and cook it for 2 minutes.
5. Now, add the coconut milk and once it gives a boil, add the stock.
6. Throw in the veggies and basil leaves. Also, salt, if needed.
7. Lastly, add the cubed cottage cheese pieces.

Serve this fresh and nourishing Thai green curry with steamed rice.

A kitchen secret

20170405_194250

Once I was talking to my ex-boss, Archana Pai Kulkari, about the despair of deciding menus. She was the magazine’s editor for which I used to work as a sub-editor. I wanted a book that could help me in the true sense. No, I didn’t need any fancy photos. Didn’t want to bring exotic veggies or ingredients for a recipe as well. Essentially, I wanted a book that could give me recipe options that I could cook up with whatever I have in hand. Archana immediately asked me what cookbooks I have with me. And she highly recommended a book called Vegetable Delights by Malini Bisen. Now, it’s hard for anyone to put down a suggestion given by her. She’s that good. I wasn’t a fool not to follow her.

So, the next morning, I found a copy of Malini Bisen on some weird online bookstore, where I didn’t shop before. They promised to deliver the book in 15 days. May be it’s a rare copy, I happily thought to myself. I clicked the buy button.

When I received the book, and looked at its contents page, I knew exactly what Archana was talking about. Published by Wilco Publishing House, the book offers recipes for 51 vegetables. Plus there are many other varieties of recipes as well. It made my daily job in the kitchen simple. I couldn’t stop thanking Archana for this gem of a book.

In my kitchen, it’s all about authentic recipes. I rarely use packaged food or readymade food. In fact, I don’t even have a mircowave. I don’t mind working hard for hours on a dish and doing things like soaking and fermenting, if the recipe calls for it. It has become a way of life now. Being at home allows me more time, though. I get that. Whenever I have a job in hand and a cook in the kitchen, I’m no more creative with planning our meals.

There are times when I need to cook a dish in minutes, and here’s when a book like Vegetable Delights comes to my rescue. For a popular vegetable like potato, Malini has given 30 recipes in her book. For green peas, she’s come up with 11 recipes. And for a rare one like cucumber, she’s written five recipes. Who cooks cucumber? Certainly, Malini knows the vegetable world better.

The vegetables go alphabetically in the contents page, and believe me, there’s no easier way to use the book. I also go through the chutney section of the book many times. If you’re an eager Indian cook, or a lover of authentic Indian recipes, you must have this one in your kitchen shelf.

PS. I miss our crazy talks, Archana Meedem. Only if I had a time machine at my disposal.

Layers of love

DSC_0613
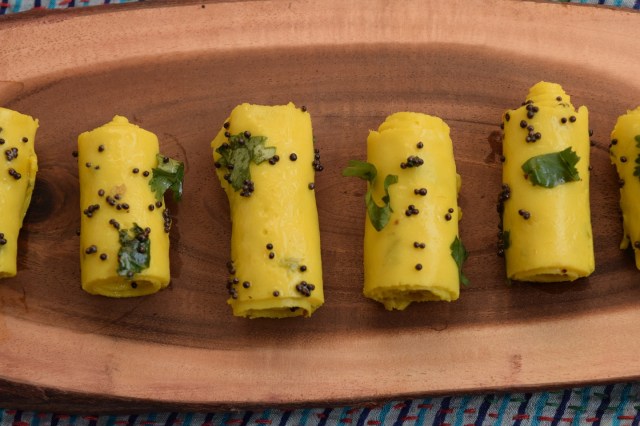
It seems to me that missing things has become a norm in my life. When I first left home to study in Bangalore, I realised how much I miss my city Surat, especially the food. Thankfully, my mum sent my favourite snack items in packets from time to time. My hostel cupboard was never empty. From her handmade ladoos to pani-puri flavoured khakhras. And now, while I live in Gurgaon, she does the same. Whenever my brothers come to visit me, they always complaint about the heavy luggage bags. After completing an year of studies in Bangalore, I came back to Surat. The year was 2010, and I had a goal in mind: to learn Gujarati snack items. And for that, I knocked the doors of none other than Mrs Niranjana Joshi.

I’m yet to find a perfectionist like Niranjana Joshi. She’s incredible. Since my college days, I have enrolled for many ‘Nira’s Cooking Classes’. She is grounded yet sophisticated and competitive. She respects each one who attends her class yet doesn’t encourage gibberish talks in-between the classes. She has own little secrets that does the magic in every dish. I just love to sit in front of her, see her teach a trick or two and have a good laugh with the lady herself. All that said, Niranjana is extremely alert when it comes to her recipes. She likes to handover her recipes only to her students. If you happen to visit Surat, make sure you attend at least one of her classes.

Talk about Gujarati farsan items, and Khandvi or Patodi will top the list, at least for me. Some home cooks, however, find it a hassle to make Khandvis. For me, it’s all about sticking to the technique, trying no short-cuts and being precise. You can’t goof up with recipes, at least, not with Khandvi.

The soft layers of Khandvi makes it a winner of a dish. So, here you go, dear readers. I’m sharing Niranjana’s recipe here. You will, however, have to bribe me to know the little secret that she gave us during the class. Ha-ha.

DSC_0620


Recipe: Khandvi/Patodi or Gram Flour Rolls

Are you ready for some arm muscle exercise? If you can’t stir the kadai for more than 20 times, don’t try this recipe. Once you put all the ingredients in the kadai, you need to keep stirring it hard for a good 10 to 15 minutes. If the gram flour mixture is not steamed well, the stirring can go on for a few more minutes. That’s exactly where people promise not to try this recipe at home, ever again. But here’s why I like it. My mum has taught me this stirring-the-kadai business ever since I was like 12 or 13 of age. I love this farsan. For me, there’s no looking ahead than a Khandvi dish that’s been perfectly steamed and rolled. So, hold on, and believe me, you’ll get there too. Just be precise and give it your best.

Ingredients

For the mixture

1 cup gram flour
2¾ cup butter milk
1 tsp ginger paste
2 tsp green chilli paste
½ tsp turmeric powder
a pinch of asafoetida
½ tsp garlic paste (optional)
½ tsp ajwain or carom seeds (optional)
salt to taste

For tempering

oil
½ tsp mustard seeds
curry leaves (optional)

For garnish
coriander leaves, chopped
grated coconut (optional; somehow, I never end up using them)
roasted sesame seeds (optional)
a pinch of red chilli powder (optional)

Tools needed

A deep kadai
A big ladle spoon and steel spatula
Steel dinner plates (alternatively, you can also use a clean kitchen counter to roll the steamed gram flour, but I like to do it on my steel dinner plates)

Method

  1. What I like to do is, make a good buttermilk first. And strain it too. If the texture of buttermilk is good, the Khandvi’s texture will be good too. And I like to keep my buttermilk out on the kitchen counter for a few hours, so that it gets a bit sour. Sweet buttermilk is what I tend to avoid.
    2. So take a deep bowl, and add in the gram flour. Add all the ingredients in it, except the buttermilk. Mix it all well.
    3. Slowly, start adding the buttermilk. What happens with me is that I end up using too much of buttermilk and later, it takes me hours to get the perfect consistency. So, make sure you don’t put too much of it. Thin consistency is what we’re looking for. But don’t go overboard with the buttermilk.
    4. Here comes the arm muscle part. You want to heat a strong kadai and once hot, add in the gram mixture. Stir it constantly. You don’t want to let this burn. No you can’t talk or look around or do anything when doing this. Just keep on stirring this mixture on high flame with a big ladle spoon you’re comfortable with. After the right hand, switch it to the left hand. Do it so for five minutes and slow down the flame to medium. Also, you just don’t want to see any lumps. Mash all the lumps and mix the mixture well.
    5. After about eight minutes of more stirring, you want to get a thick consistency. Now is the time to do the consistency test. Take the back of a steel dinner plate. Wipe it clean and grease it lightly. With the help of spoon, take a spoonful of the steamed gram flour on the plate. Spread it with a steel spatula. After two minutes, cut it our into a thin sheet and try rolling it. If you’re successful, your next quick task is to switch the flame to slow and spread the steamed gram paste on all plates. This has to be done fast, because if the paste dries up, it won’t spread easily.
    6. After about four to five minutes, start drawing long lines on the sheets. And start rolling them. Don’t worry if they cut in between. Keep rolling the cuts and you’ll see them hidden under the rolled piece.
    7. Put all the rolls in a plate. Now is the time to do a little temper round. Heat oil in a small kadai. Add curry leaves, mustard seeds and asafoetida. Let it splutter. Now quickly add this oil mix onto the batch of Khandvi. Mix them lightly, just in case if the oil hasn’t reached a spot or two.
    8. Before you serve them, garnish it with coriander leaves, grated coconut, roasted sesame seeds and a hint of red chilli powder. I like to add the latter two when I serve them to special guests.

Voila! Enjoy the delicate savoury Gujarati snack to the hilt! Khandvi isn’t made in machines, dear readers. You can easily make it at home. Plus, it can be prepared in less than half an hour. Go for it.